Sunday 21 May 2017

SharePoint Server 2016 Overview

SharePoint Server 2016 Overview

SharePoint Server 2016 should be the premier choice for organisations who are looking to take advantage of the latest innovations in Microsoft Cloud offerings while also maintaining critical content or custom applications on-premises.
SharePoint foundation is no longer available in SharePoint 2016.
Lets look at the Whats new, Whats improved and what has been deprecated in SharePoint Server 2016.

Change in Boundaries and Limits as compared to SharePoint 2013.

there is some changes in boundaries and limits in as compared to SharePoint 2013 as listed below.

  1.  In SharePoint 2013 default file size was 250 MB which can be increased to 2 GB whereas in SharePoint 2016 , default file size in 10 GB and it also have removed character limits.
  2. List threshold of 5000 items have been removed in SharePoint 2016. so as soon as items in a library or  increases beyond 5000 items SharePoint 2016 adds index into it so technically the limit is still there however the creation of indexes is managed by SharePoint.
  3. In SharePoint 2016 we can have 200 GB content db limit in general usage scenarios where in SharePoint 2016 content db can be in TBs
  4. In SharePoint 2016 we can have up 100000 sites collections in a content db, in SharePoint 2013 this limit was 5000 max (2000 recommended).
  5. There cab be 500 millions indexed items per search server in SharePoint 2016. in SharePoint 2013 this limit was 100 milions per search service application.  

Hardware and Software Requirements for SharePoint Server 2016

Software Requirements
Operation System :

  • Windows Server 2012 R2
  • Windows Server 2016 Technical preview 4
Software :
Microsoft SQL Server 2014 Service Pack 1
SharePoint Server 2016


Hardware :
Single Server Role : RAM 16-24 GB, Processor : 64 bit 4 cores, Space : 80 GB system drive 100 GB additional drive
Web Server or Application Server (Three tier farm) :  RAM 8-12 GB, Processor : 64 bit 4 cores, Space : 80 GB for system drive and 800 GB for other drive.

Important Points regarding upgrade to SharePoint 2016

  1.  SharePoint 2013 can be directly upgraded to SharePoint 2016. SharePoint 2013 will supports for incremental upgrade to next version for next version of SharePoint.
  2. any site collection with 14.5 mode need to be upgraded to 15 mode, this is required if there is any backward compatible site collection (from SharePoint 2010) then it need to be upgraded to SharePoint 2013 to ensure that they can be upgraded in SharePoint 2016.
  3. We can not upgrade from SharePoint 2010 to SharePoint 2016. We have to upgrade to SharePoint 2013. SharePoint 2013 will be foundation for upgrade to next releases of SharePoint.
  4.  As with previous versions, we can deattach the database from SharePoint 2013 and re-attach to SharePoint 2016 for upgrade.

New and Improved feature in SharePoint 2016 Release

1. MinRole farm topology
While installing SharePoint 2016, you have to select a role of the server. On the basis of the selected role SharePoint will configure the services on the server.
for a detail of all the roles please have a look on the technet
https://technet.microsoft.com/en-us/library/mt346121(v=office.16).aspx

2. Central Administration is not provisioned on All servers by default
 In SharePoint 2016 Central administration webapplication is no longer installed on all servers by default, it will be installed on first server. however you can install on other servers also using PowerShell or Products technology configuration wizard.

3. Compliance Features

the document deletion policy allows to delete documents in one drive for business after a certain period of time.

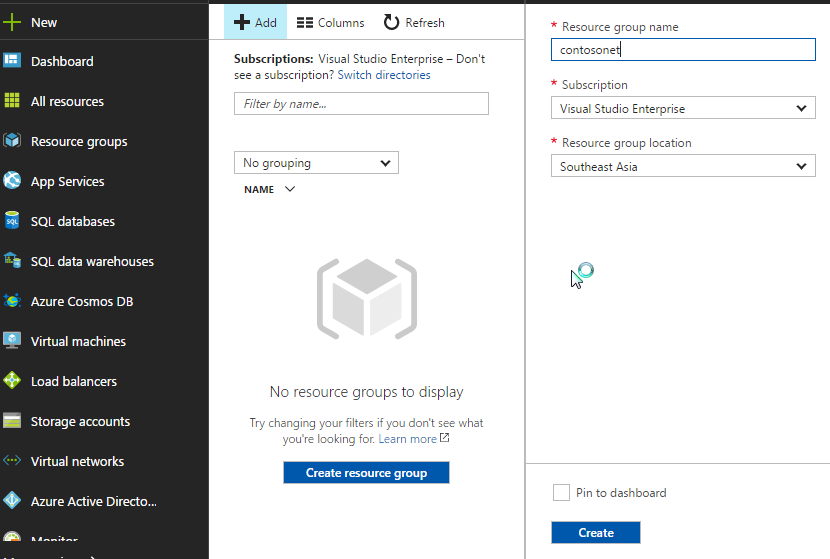
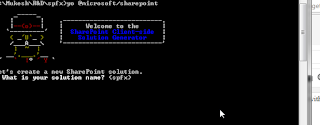
4. Fast Site Creation

SharePoint 2016 provides templates which can be used to create sites which takes only a few seconds.

5. Special character in File names

Special characters like &,~,{ and } are now allowed in SharePoint 2016. it also removes the limit of 128 character length and filenames with leading dots.

6. Hybrid in SharePoint 2016

In SharePoint Server 2016 Release, new hybrid features are available to enable hybrid 
solutions. 
  • Hybrid sites 
  • Hybrid sites features 
  • Hybrid OneDrive for Business 
  • Cloud hybrid search 
7. App Lancher and previews of images and videos


With app lancher, all your apps are easily available from the top navigation bar.
also you can see previews for images and videos on hovering it.

8. Sharing

The following list shows the sharing improvements that are available for SharePoint Server 2016 
Release: 
  •   Create and Share folder 
  •   Sharing Hint 
  •   See who the folder is shared with when viewing a folder 
  •   Members can share 
  •   Improved invitation mail 
9. Open document format now available

Now we can use open document format document in libraries , it can also be used as templates.

10. SMTP connection encryption

In SharePoint 2010 and 2013 SharePoint always uses port 25 for SMTP communication
where as in SharePoint 2016 we can use any port with STARTTLS encryption.

11. Authentication

  • SAML authentication becomes a first class citizen in SharePoint 2016. 
  • There were multiple authentication providers in SharePoint 2013 like windows Claims, form based authentication, SAML Claims, WSFED and others to provide backward compatibility. 
  • In SAML Claims is the default and recommended model but SharePoint 2016 will continue to support Windows Identity. 

Deprecated Features in SharePoint 2016 Release

Here are some features that has been deprecated in SharePoint 2016

  1. SharePoint foundation has been deprecated in SharePoint 2016
  2. Stand alone install mode is no longer available however you can create single server farm.
  3. Forefront Identity Manager has been removed, it was used to synchronise between AD and SharePoint . instead Active directory import is used. other tools also available to sync like Microsoft Identity Manager. 
  4. stsadm.exe has been deprecated
  5. Tags and notes has been deprecated


Saturday 20 May 2017

Setup SharePoint 2016 Machine on Azure

Lets see how we can setup a SharePoint 2016 environment in Microsoft Azure.
In this post I assume that you already have azure subscription, if not then please sign up first.
This is a step by step guide for creating SharePoint 2016 single server farm on Microsoft azure with Active directory domain controller, sql server and SharePoint 2016. The architecture of the farm is given below.

Resource Groups

Following resource groups will be created however you can choose to create only one resource group but here I will create four because of the different lifecycle of AD , SQL , SharePoint and networks. Here is the resource groups

1.    contosonet  : contains network security group and virtual network
2.    contosoad    : contains AD Domain controller
3.    contososql   : contains SQL server
4.    contososp    : contains SharePoint 2016.


Steps
Following steps will be followed to create the environment
  1. Step 1 : Create the resource groups.
  2.  Step 2 :  Create network security group and virtual network.
  3.  Step 3 : Create Virtual machine sp2016ad and configure Active directory domain controller. Create required service accounts
  4. Step 4. : Create virtual machine sp2016sql and configure sql server.
  5.  Step 5  : Create virtual machine sp2016sp and configure SharePoint 2016.


Step 1 : Create resource groups

Login to azure management portal at http://portal.azure.com go to resource group and click add as shown in image below.


Click create and it will be created. Similarly click add and add other resource groups like contosoad contososql and contososp.

Step 2 :  Create network security group and virtual net work


On the dashboard click new and type network security group , select the network security group and click create  type name as whatever you want , I have used “networksecuritygroup-nsg” and choose resource group as contosonet as shown in image below.

You need to allow TCP port 3389 in this network security group so that you can take the take the RDP.
So open network security group and go to inbound rules and add a rule as shown in the figure below.


Similarly, from the left pane click on virtual networks and click add as shown in image below.

Type a name I have used contosovnet and resource group contosonet click create and you are done with step 2 let go to step 3.

Step 3 : Create Virtual Machine sp2016ad and configure Active directory domain controller, Create required service accounts


Now you are little bit familiar with the screen so I will not present much screens here however I will show where something important happens.
Following steps will be followed
  1. Setup ad machine
  2. Install Active Directory Domain Service feature and create a domain
  3. Create required users.


Setup AD Machine

Go to virtual machines on the left pane and click add, a text box will be shown, type “Windows Server 2016 Datacenter”, select the same filter result and click create.
Type name : sp2016ad , username : <a user name of your choice>and password : <password> Resource group : contosoad  please note user name and password as it will be required to connect later.

When you click ok , next screen will come choose a size of your machine and click ok.
Next screen will come for settings in the settings select virtual network as contosovnet and network security group as “networksecuritygroup-nsg” which was created earlier and shown in the screen below.


Click ok and follow the screen and click ok. The vm will be provisioned.

Install Active Directory Domain Service feature and create a domain


Go to your virtual machines, click sp2016ad and click connect, a rdp file will be downloaded. Click that file and enter your credentials to connect to virtual machine.
Please note  : you can enter credentials like <machine name>\<user name> for ex . here sp2016ad\username.
Now on the virtual machine open power shell in elevated mode and type below command.

Install-WindowsFeature AD-Domain-Services -IncludeManagementTools
Install-ADDSForest -DomainName sharepoint2016.contoso.com

The second command requires a password and it will restart AD machine.
After ad machine restarted , run the rdp file and login again. Please note this time you have to login using domain account. As I have created domain sharepoint2016.contoso.com. so you can used sharepoint2016\<your user name> and password that you had given while creating vm.
 open PowerShell and run below command.
Add-WindowsFeature RSAT-ADDS-Tools

Create required users


Now create users like farm account. I will create only farm account, you can choose to create service account also.
Go to start type run and open dsa.msc or active directory users and computers.

Create new user as shown in the image above. And enter the details for farm account as below.

Click next and set password,password never expires , user can not change the password and click ok.
Go to the properties of newly created user and in “member of” add “domain admin”.

Lets move to next step and create sql machine

Step 2 : Create sqlvm and grant the required access


Following steps should be followed while creating sql machine.

  a.    Setup virtual machine
  b.    Set the dns for virtual machine
  c.    Add machine to the domain
  d.   Grant spfarm sysadmin access

Setup virtual machine


Now go to virtual machine and create a new virtual machine by clicking add. Enter “SQL Server 2016 SP1 Enterprise on Windows Server 2016” in the filter box and select the machine as shown below.

Click create and give name sp2016sql , type user name and password. Note this user name and password as it will be needed later to connect. Similarly select existing resource group as contososql and click ok.
As per pricing model select a size. It can be scaled later.
Click ok next screen is important. See how I have used same virtual network and network security group that created earlier.

Follow the screen and let it finish.

Set the dns for virtual machine


Next important work is to set the dns of sql machine (sp2016sql) to ad machine. Please note this step has to be done on SharePoint machine also.
Go to virtual machines >> sp2016ad >> network interfaces and note down the private ip of the network interface as shown in image below.

In my case, it is 10.0.0.4
Now we need to set the dns of sql machine to 10.0.0.4 lets do that.
Go to virtual machines >> sp2016sql >> network interfaces and click on the network interface.
In the network interface click on dns server and select custom and in the box type your dns server ip in my case it is 10.0.0.4 and click save as shown in the image below.

Restart the virtual machine

Add machine to the domain


Now login to your sql machine and add sql machine to the domain sharepoint2016.contoso.com .
Go to sql virtual machine>>this pc >> properties and next to workgroup click change settings.
Select domain and enter domainname as shown in image below.

Click ok. You have give domain admin password and the machine will be restarted.

Grant spfarm sysadmin access


Wait for machine to restart and login to the machine again using the credentials given while creating (machinename\username) and grant spfarm(sharepoint2016\spfarm) to sysadmin access on sql server.
And you have done with sql server now lets create machine for sharepoint.

Step 5  : Create virtual machine sp2016sp and configure SharePoint 2016.


Following steps needs to be followed.
 a.    Setup VM
 b.   Change dns for VM
 c.   Add Machine to Domain
 d.   Run SharePoint products and technology configuration wizard

Setup VM


Go to virtual machines and add a virtual machine search for sharepoint 2016 trial and click create:
Enter name “sp2016sp” and choose your username and password as you wish click ok.
Only the thing which is important is you need to choose virtual network and network security group as created before.

You can have rest things default.
Wait for machine to create.

Change dns for VM


 Now change the dns to 10.0.0.4 (in your case it is the internal ip of ad machine.) as done with sql machine.

Add Machine to Domain


And add the machine to sharepoint2016.contoso.com domain as done with sql.

Run SharePoint products and technology configuration wizard


Now we have to run the products and technology configuration wizard.
Login on sharepoint machine with spfarm account , ofcourse it will be like domainname\username for me it is sharepoint2016\spfarm and run the products and technology wizard
Create a new server farm here is settings for me.

In the next screens enter passphrase and select single server farm.after this wizard completes the SharePoint will be provisioned.


Friday 12 May 2017

Azure Resource Manager

The deployment that uses Azure service management(ASM) are called classic deployment model.
In 2015 Microsoft introduces a deployment model called Resource manager deployment model which is more functional and is replacement for ASM.

Classic and resource manager resources are not compatible with each other. for example suppose you have some VM, storage account classic resources then these can not be seen by Resource manager resources and vice versa. how ever there are techniques which can be used to migrate these resources to resource manager resources.

Please Note:
There are two versions of the portal. The production portal is the Azure portal at
https://portal.azure.com. Most features have been moved to the Azure portal, with some exceptions
such as Azure Active Directory (Azure AD). The previous portal is called the classic Azure portal
(https://manage.windowsazure.com), and it can still be used to manage Azure AD and to configure
and scale classic resources such as Cloud Services.


In Azure every resource should should be in a Resource Group. A resource group is a logical container which holds related resources. in Resource Manager deployment model , the deployment is done on resource group so all the resources in the resource group is deployed in parallel.
Important point here is that all the resource in a resource group should be same life cycle. for example. suppose you have a web application A that uses a database D. if this database is used by some other application also suppose B or database D needs to live after A is retired or you need not to recreate the database D while deploying on A,  in such cases D should be in separate resource group.

here are some points that should be noted for resource groups.

  1.  All the resource in a resource group should have same life cycle.
  2. Every resource must belong to a resource group.
  3. Resources can be added or removed from resource group any time. so if you remove the resource from a resource group then add to other.
  4. Resource groups can be used to controll access for the resources there in.
  5. Region does not matter for resource and resource groups
  6. removing resource group, removes all resources in that group

Why use Resource Manager
With ASM, the deployments were sequential however with Resource manager deploys in parallel so it is much faster that ASM

here is some important points about resource manager,


  1. You can create a reusable (JSON) template that can be used to deploy all of the resources for a specific solution in one step. You no longer have to create a VM in the portal, wait for it to finish, then create the next VM, and so on. 
  2. You can use the template to redeploy the same resources repeatedly. For example, you may set up the resources in a test environment and find that it doesn’t fit your needs. You can delete the resource group, which removes all of the resources for you, then tweak your template and try again. If you only want to make changes to the resources deployed, you can just change the template and deploy it again, and Resource Manager will change the resources to conform to the new template. 
  3. You can take that template and easily re-create multiple versions of your infrastructure, such as staging and production. You can parameterize fields such as the VM name, network name, storage account name, etc., and load the template repeatedly, using different parameters.  
  4.  Resource Manager can identify dependencies in a template but allows you to specify additional dependencies if necessary. For example, you wouldn’t want to deploy a virtual machine before creating the storage account for the VHD files that are used for the OS and data disks.  
  5. You can use the new Role-Based Access Control (RBAC) to control access to the resources in the group. For example, you can assign the Owner role to a user, giving that user full administrative privileges to those resources in the group but not to other resources in the subscription. Other roles include Reader (you can read anything except secrets) and Contributor (you can do most anything except add or revoke access).  
Resource manager templates are important and they defines deployment and configuration of your application. 
Deployment can be done in a set of template where there is a master template that links all the required template.

Lets talk more about Role Based Access Control(RBAC).
In classic modal either you can grant full administrative permission to a user for all resources in subscription or  no access but in Resource Manager modal you can grant different roles to users or groups at different levels like resource groups or resources.

Roles are actions and notactions which defines what user or group can do and what can not.
there are several predefined roles like owner , contributor etc, 
custom roles can also be created. for more about roles please have a look on the following article on technet.
https://docs.microsoft.com/en-in/azure/active-directory/role-based-access-built-in-roles 


Monday 8 May 2017

Update lookup field or person field in jsom

When we talk about how to update lookup field or person or group field using jsom then it is treated little diffirently.
for example, for normal field we use

listitemobj.set_item(fieldname,value)
but that will not work for lookup fields.
for lookup fields following step should be followed.

to update person or group field we should pass id of the person or group.

for example if id of the user is 5 then update should be like below.

listitemobj.set_item(personfieldname,5);

similarly for lookup field, a lookup field value should be created first.

example:
var lookupfieldvalue = new SP.FieldLookupValue();
 lookupfieldvalue.set_lookupId(<id of the item to lookup>);
 oListItem.set_item(lookupfield, lookupfieldvalue);
 oListItem.update();

if we summarise both in a function then

function createListItem(personfield,lookupfield) {

        var clientContext = new SP.ClientContext(_spPageContextInfo.webAbsoluteUrl);
        var oList = clientContext.get_web().get_lists().getByTitle(<list name>);
        var itemCreateInfo = new SP.ListItemCreationInformation();
        this.oListItem = oList.addItem(itemCreateInfo);

// set person field
        oListItem.set_item(personfield, <id of the user or group>);

//set lookupfield
var lookupfieldvalue = new SP.FieldLookupValue();
        lookupfieldvalue.set_lookupId(<id of the item to lookup>);
        oListItem.set_item(lookupfield, lookupfieldvalue);
        oListItem.update();
        clientContext.load(oListItem);
        clientContext.executeQueryAsync(Function.createDelegate(this, this.onQuerySucceeded),      Function.createDelegate(this, this.onQueryFailed));
    }

    function onQuerySucceeded() {
        alert('Item created Successfully !!!!');
    }

    function onQueryFailed(sender, args) {

        alert('Request failed. ' + args.get_message() + '\n' + args.get_stackTrace());
    }
  

Sunday 7 May 2017

Linking Author Name to Profile in XSLT in Share Point 2010


How to Link Author name to profile Picture using xslt:


Recently I was working on a project and i need to link the author name to profile i.e created by name to profile in content query webparts ItemStyle in Item style.xsl

Now bellow <xsl:styleSheet tag Create parameters as bellow
<xsl:param name="PageUrl"/>
<xsl:param name="SiteUrl"/>
<xsl:param name="WebUrl"/>
PageUrl will contain the url of the page . SiteUrl will contain Url to Site. Web Url contain url to web.
you can concat SiteUrl and WebUrl to get WebUrl as below.

First declare a variable and perform a user lookup  on the account name of the user.
<xsl:variable name="authoraccount">
<xsl:value-of select="ddwrt:UserLookup(string(@Author) ,'Login')" />
</xsl:variable>
Now as we have account I can link it to sites person.aspx
 <xsl:variable name="FinalUrl">
                    <xsl:value-of  select="concat($SiteUrl,$WebUrl)"/>
   </xsl:variable>
Please Contact <a href="{$FinalUrl}/_layouts/userdisp.aspx?accountname={$authoraccount}&amp;Source={$PageUrl}"><xsl:value-of select="@Author"></xsl:value-of></a>

Setup dev environment for spfx

So lets setup dev environment for SharePoint Framework abbreviated as SPFX. for an Introduction of What is SPFX and What are the capebiliti...